Latest articles:
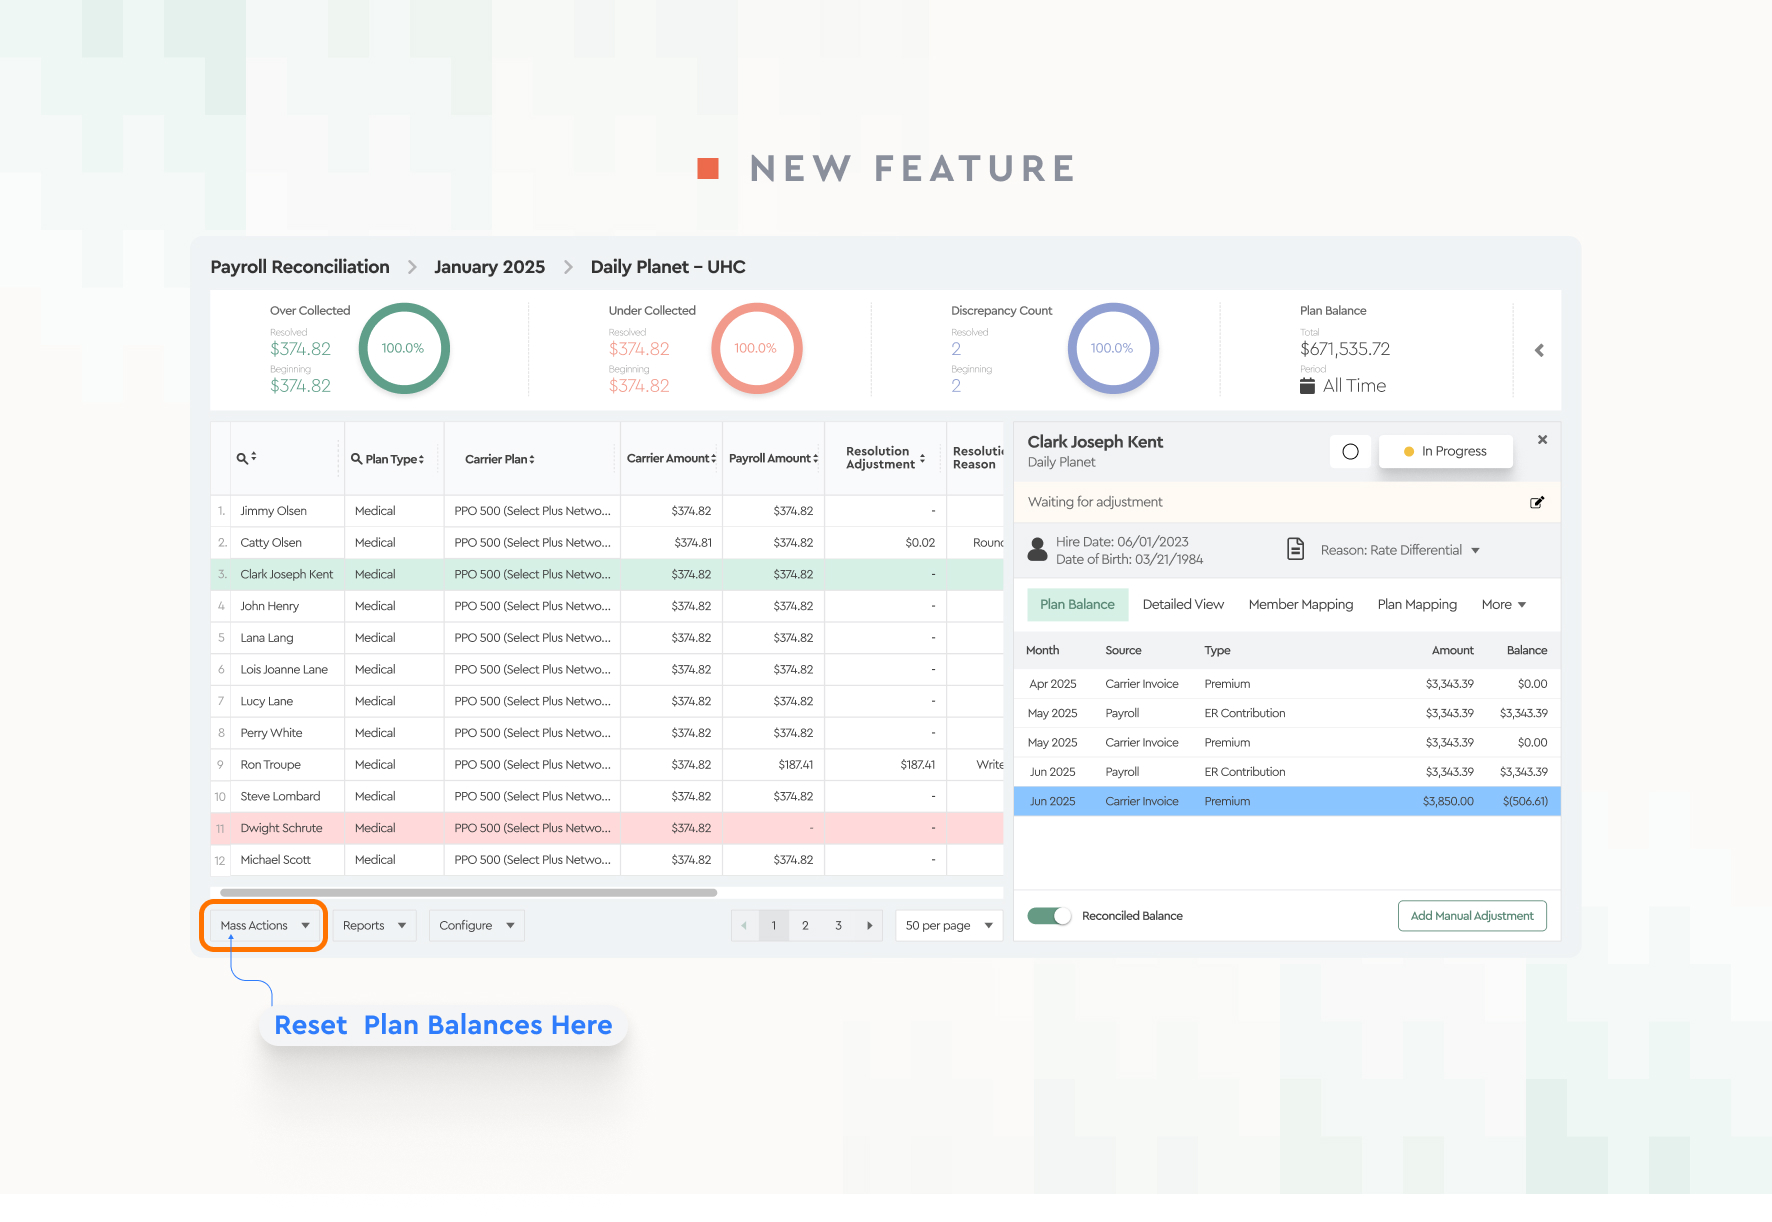
Automated plan balance adjustments
New in Benefits Reconciliation: the Mass Adjustment Template now calculates plan balance adjustments automatically. Clear balances in a few steps.

June 12, 2026

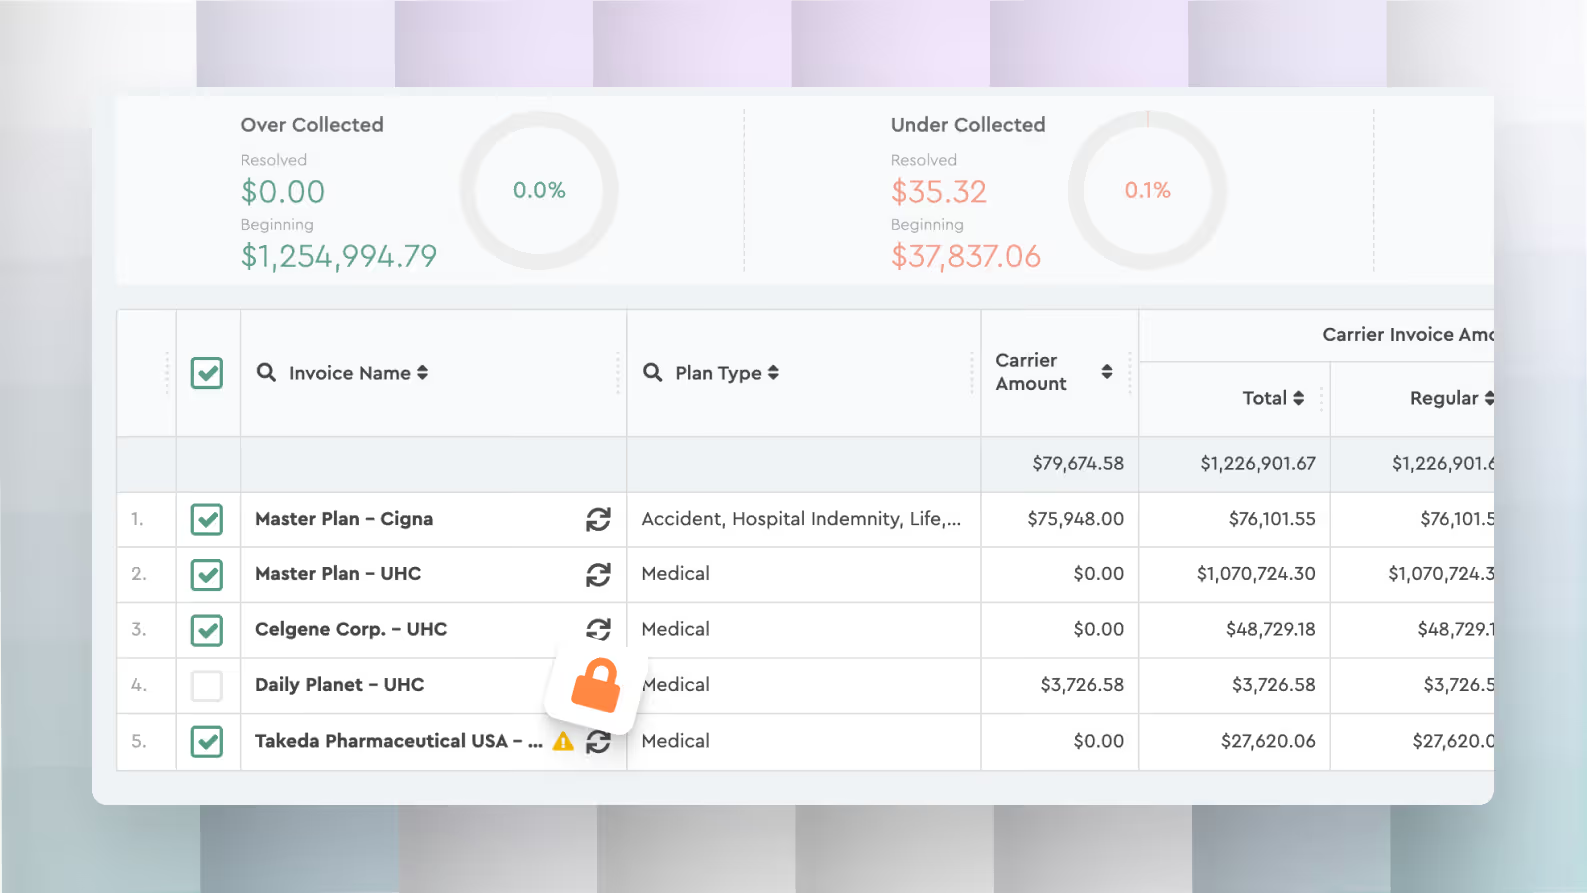
New Invoice Lock Feature
Lock an invoice to finalize reconciliation and prevent further changes such as regenerating data or applying mass updates.
March 11, 2026
How-to's:
Step-by-step guides to help you get things done in Tabulera.
Learn how to configure features, run workflows, and solve common tasks.
 Reconciling Benefit Invoices against Workday Reports
Need to reconcile benefits invoices against Workday? This guide walks you through generating the reports inside Workday.
December 22, 2025
Learn how to upload and map Enrollment, Payroll, COBRA and Carrier Invoice Files.
Understand how to navigate Tabulera’s Reconciliation UI to resolve variances faster.
Set up plans accurately with Tabulera’s new tools.
Access carrier invoices faster with Tabulera's auto-fill extension.
Learn how to link unmatched employee records in your system.
Learn to map and merge plans and persons.
Learn to reconcile your first benefits invoice.
Product Updates:
What’s new in Tabulera. Short updates on new features, improvements, and fixes.
Automated plan balance adjustmentsNew in Benefits Reconciliation: the Mass Adjustment Template now calculates plan balance adjustments automatically. Clear balances in a few steps.
June 23, 2026
Lock an invoice to finalize reconciliation and prevent further changes such as regenerating data or applying mass updates.
February platform update with improvements to benefits reconciliation, pre-pay invoice matching, variance tracking, notes visibility, and consolidated
With the new drag-and-drop upload, you can now simply drop all your monthly invoice files into the platform at once.
Quickly regenerate invoices right from the invoice view—no extra clicks, no backtracking.
The Mass Updates of Employee Records feature in the Benefits Reconciliation Module simplifies bulk editing of employee records.
We’ve introduced a count of "In Progress" items, Notes column search functionality, multi-month invoice refresh, and color-coded employee line items.
Quickly find employee, dependent, or company data with just a few keystrokes, streamlining the process.
Blogs:
Insights on benefits operations, reconciliation, and EDI.
Learn how teams reduce errors, save time, and scale their processes.
 15 Best HR Tools & Software to Consider in 2026
Discover the best HR tools for 2026. Compare top HR software and solutions for onboarding, employee engagement, payroll, and more.

July 11, 2026
Discover 15 HR best practices for 2026 that improve employee engagement, retention, compliance, performance management, and workforce planning.
What is PrismHR: complete guide to PrismHR including payroll features, company overview, and whether it’s the right HR platform for your business.
Effective cost-saving initiatives for large companies. Learn practical cost reduction ideas, business cost-saving strategies, and operational efficien
A $200K medical bill case shows why self-funded employers face uncapped risk from enrollment errors -and how regular reconciliation prevents it.
Discover the best AI tools for insurance brokers to automate operations, improve client experience, and boost revenue. Full guide to AI tools for insu
Compare ASO vs PEO services, understand the key differences, costs, risks, and benefits. Learn which HR outsourcing model fits your business.
Do part-time employees get benefits? Learn which benefits are required by law, what employers can offer, and how to design part-time benefit policies.
Learn what is HRIS, how HRIS systems work, and why businesses use HRIS software to manage employee data, payroll, and HR processes efficiently.