August 28, 2024
Member Mapping
We have a new update to Tabulera’s Benefits Reconciliation Module—Member Mapping. Previously, this process required switching to the Old UI, but now, it’s fully integrated into the New UI for a seamless reconciliation experience.
What is Member Mapping?
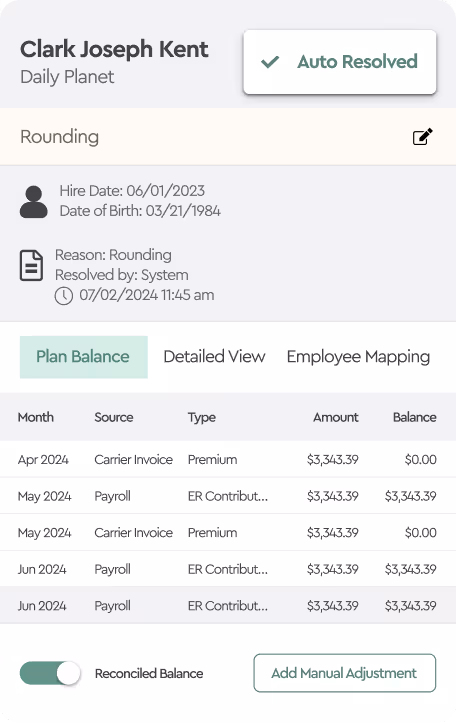
When you’re performing a reconciliation and viewing the member list, you might notice some members with a red icon next to their names. This icon indicates that the member appears on an invoice but isn’t matched in Tabulera's database. This usually happens because the members name is different on the invoice compared to the Enrollment or Payroll systems, making it impossible for the platform to automatically connect them. The Member Mapping feature allows you to manually link these records.
How to Use Member Mapping
- Filter Unmapped Members: Start by filtering the Member View to display only the unmapped members. Click on the icon in the Person Column and select “Not Enrolled Members.”
- Select and Map: Choose a member from the list. In the panel that slides out from the right, navigate to the Member Mapping Tab. If you know the name as it appears in the HRIS, begin typing it, and select the correct entry from the suggestions. In our demonstration case, the invoice shows “Cat Grant,” and the HRIS lists “Catty Grant-Olsen,” you can map these records together. If you’re unsure of the exact name, start typing, and the platform will narrow down the options. Alternatively, you can manually enter the details if you know the members SSN. There’s also an option to ignore the mapping, which is useful for COBRA employees.
Advanced Options
In more complex scenarios, you can use the Advanced Options:
- “Activate this mapping only for the specified date range”: Use this when a member has changed companies, and you need the platform to recognize that the employee works for a different company after a certain date.
- “Apply Mapping to this Member Plan Only”: This option is for when you want to map a member for a specific invoice (e.g., for this month or year only).
Once you’ve mapped the member, click “Create Mapping.” The icon next to the employee’s name will change to a clock, indicating the mapping is complete. Remember, after mapping, you need to regenerate the reconciliation report. To save time, map as many employees as possible before regenerating.
Regenerate Reconciliation Reports
To regenerate the reconciliation reports, click on the Payroll/Enrollment Reconciliation Button in the Top Navigation menu. Then, click the Regenerate Button next to the invoice you’ve been working on.
Review and Adjust Member Mappings
To view all Member Mapping configurations for a specific invoice, go inside the invoice. At the bottom of the screen, click the “Configure” button and select “Member Mapping.” Here, you’ll see all your mapped members. If you need to correct any mappings, simply click the “Remove” button and remap the employee. Remember to regenerate the reconciliation report after making any changes.