PRODUCTS
Platform Overview
The full benefits operations suite
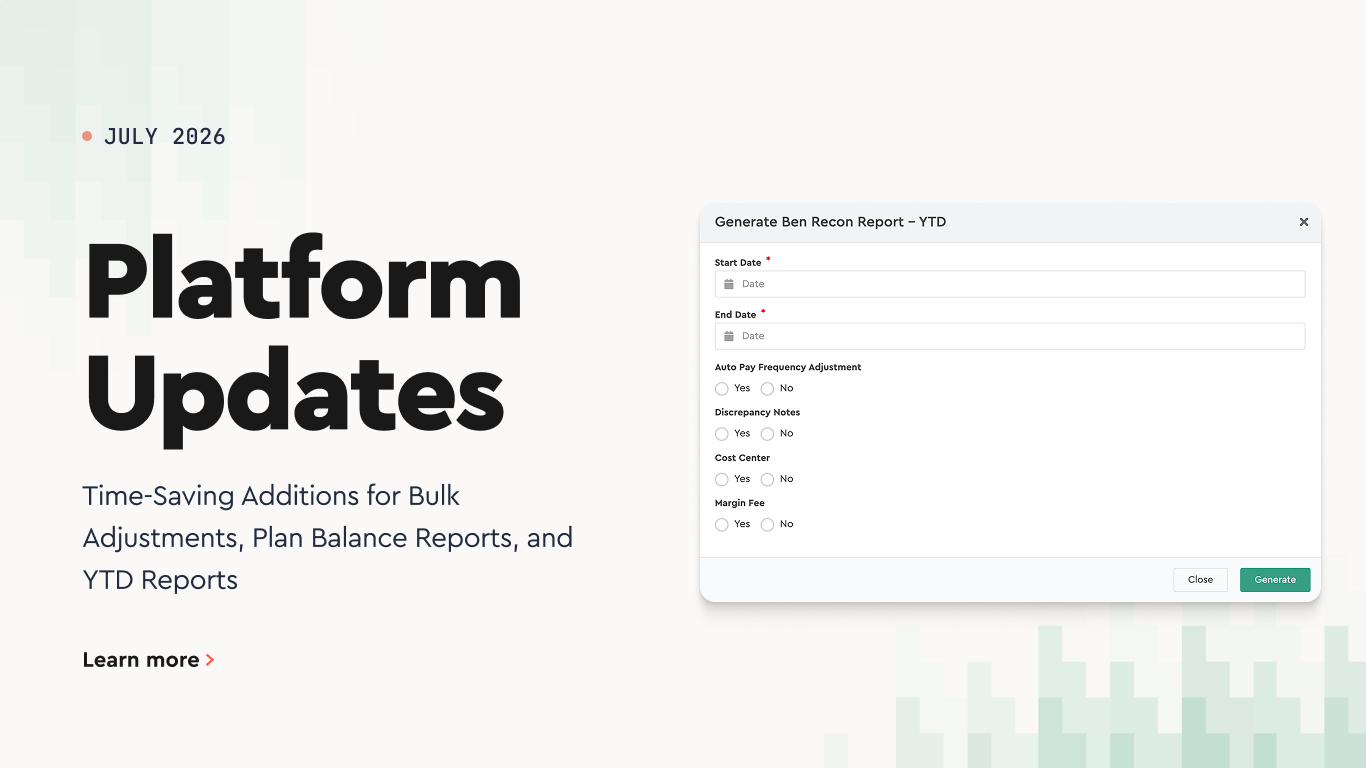
Benefits Reconciliation
Audit every invoice automatically
EDI Connectivity
Carrier feeds live in under 30 days
Small Group Data Transfers
Automated web portal enrollment
Payments Automation
Pay carriers without spreadsheets
Consolidated Invoicing
One invoice across all carriers
Markets
Works with any hris/payroll
about tabulera
Request a demo
Platform
PRODUCTS
Platform Overview
The full benefits operations suite
Benefits Reconciliation
Audit every invoice automatically
EDI Connectivity
Carrier feeds live in under 30 days
Small Group Data Transfers
Automated web portal enrollment
Payments Automation
Pay carriers without spreadsheets
Consolidated Invoicing
One invoice across all carriers
Who we serve
Markets
Integrations
Works with any hris/payroll
About